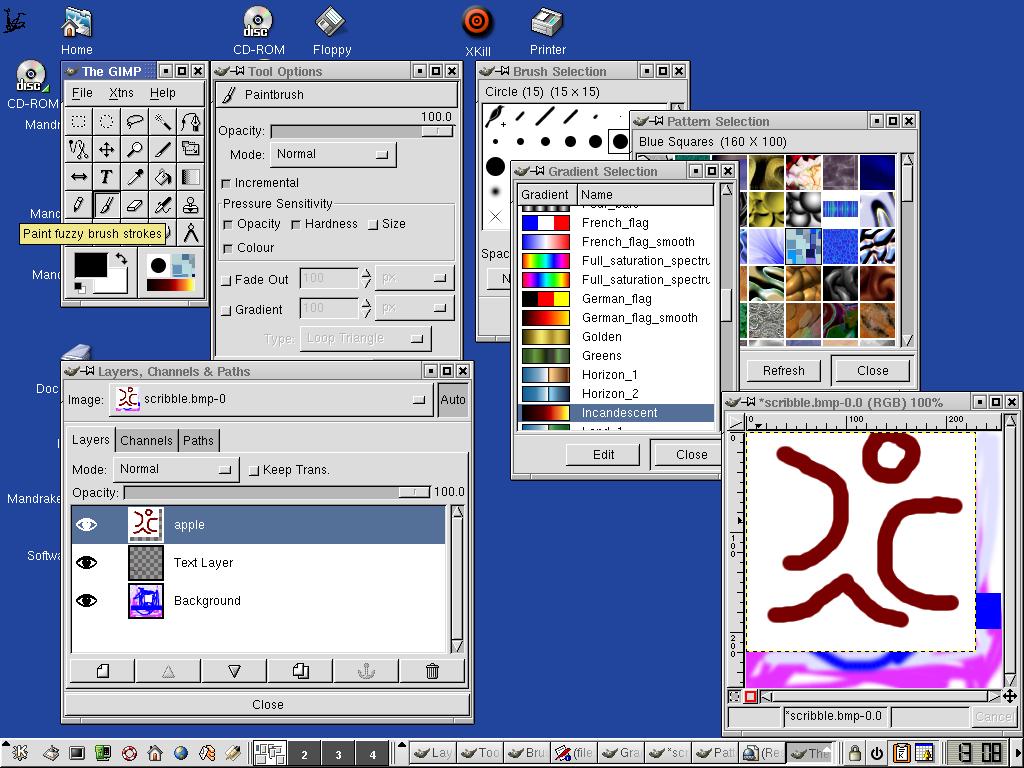
Gimp works in layers of pictures which can be superimposed. This can
be
thought of as a series of slides or transparencies on top of one
another. The
'background' layer is
distinct as it is NOT transparent and therefore
cannot be moved up the stack of slides. However, the background layer
can be made transparent by clicking on Layers and Channels and
creating
an alpha channel, if required.
When saving work from Gimp it is best to save it with an xcf suffix, as
this is Gimp's native format. Then no information at all should be
lost. Once
complete, a picture can be saved as a jpeg or other form as
appropriate.
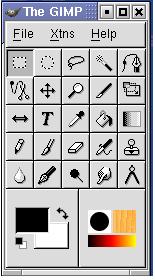
There are 21 basic tools. Often the tools have more than one function, and several options available. These options can be accessed by double-clicking the tool icon button.
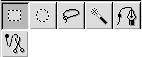
Selection tools allow you to select an area of the image, and apply changes to that selection only. The six tools located at the top of the toolbox allow you to create and edit selections.
Transformation Tools alter the perspective of the image (whether by position, size, rotation etc)
Artistic Tools work much in the same way as the items they represent. The convolve tool works like a paintbrush, but will blur or sharpen an image instead to adding colour.
The Colour Tools are used for selecting, filling and creating colour effects.
The Colour Select tool (or eyedropper) can pick up any colour from a pixel in your image. By clicking the mouse the selected colour can be applied to either the foreground or background colour. This colour matching is particularly useful for manipulating photographs.
Bucket Fill
The Bucket Fill tool fills the image or active selection with any
active colour
or pattern. This tool has a
few different options.
Opacity - can be adjusted incrementally to allow the background colour
to seep
through.
The little arrows on the Foreground/Background Colour Selector tool swap the foreground and background colours. The little black and white boxes in the lower left corner reset the colours to the default black and white.
Go to File|Dialogs|Brushes to bring up the Brush Selection window.
Brush settings can be applied to any of the painting and drawing tools
with
different effects.
Select
brushes by clicking on them.
Larger brushes can be found by clicking and holding thumbnails that appear to be blank.
Opacity
Is contolled by a slider which ranges from 0 (transparent) to 100
(opaque).
It can be used like paint thinner or thickener!
Spacing
The slider control determines the space between brushstrokes.
Spacing
should be set low for a continuous line.
Working with Selections
There are two ways to bring up tool option windows.
Either
Double-click the tool icon
Or
File|Dialogs|Toolbox options - then the options window for the tools
you select
will come up automatically.
Antialias - produces smooth edged selections
Feather - smoothes a selection by means of fading - especially useful
for
manipulating photographs.
When using the fuzzy select tool, a 'Sample Merged' option is
available. This
allows the selection to be
created using all layers rather than just the current layer.
Once an area is selected, any changes you make will apply just to the
selection
area (until the selection is
deactivated).
Selecting rectangles
Activate Rectangle tool by clicking the icon.
Left click with the mouse cursor at the corner of the area to be
selected. Then
drag until the selection is
the size you desire.
When you release the mouse button, a dotted line indicates the area of
selection.
Additional Selections
To achieve extra selections
Make first selection as above.
Hold Shift key while making any further selections.
Joining Selections
If selections overlap, then when you follow the process above, they
will become
a single selection.
To remove an area from a selection, use the Ctrl key (rather than the
Shift key)
whilst selecting the area to
be removed from the initial active selection.
If you only want to select the overlap area of two selections then use
Shift and
Ctrl together.
Deactivating Selections
There are three alternative ways
If you make a new selection, the previous one will be deactivated.
Or
Left-click once on image whilst in a selection tool mode.
Or
Right click on image. Then from Menu options click Select, then choose
None.
Creating Lasso Selections using the same principles.
Selection Menu Options
Invert
All - You can select an image - if you also use the layer option 'Keep
Transparent', then transparent areas
will remain unselected.
Float
Border - experiment with this for frames or outlines.
Grow and Shrink
 It is possible to drag and drop many things in the GIMP, for instance
selecting a colour from the pallette. Patterns can also be applied
this
way, except that you click on the pattern you have chosen with both
left
and right mouse buttons.
It is possible to drag and drop many things in the GIMP, for instance
selecting a colour from the pallette. Patterns can also be applied
this
way, except that you click on the pattern you have chosen with both
left
and right mouse buttons.
www.gimp.org/tutorials.html
Additional Tutorials
- Offers a variety of resources, links and tips. This official GIMP
website also has basic tutorials guiding you through aspects of the
program.
http://gimp-savvy.com/BOOK/index.html Advanced info
- manual to GIMPs subtleties.
http://gug.sunsite.dk Click here
- large collection of GIMP tutorials
Many shortcuts are available in the GIMP. Here is a list of some handy ones:
| Zoom in/out | [=] and [-] |
| Zoom to actual size | [1] |
| Colour picker | [0] |
| Select all | [Ctrl] + [A] |
| Select none | [Ctrl] + [Shift] + [A] |
| Feather selection | [Ctrl] + [Shift] + [F] |
| Float selection | [Ctrl] + [Shift] + [L] |
| Eraser | [Shift] + [E] |
| Merge visible layers | [Ctrl] + [M] |
| Repeat last filter | [Alt] + [F] |

functions as you would expect more or less. This function is used to
eliminate
unwanted edges.
click crop tool to activate
move cursor to where you want to begin the crop
then click and drag diagnally to select area to be cropped
release mouse button
then the crop window appears containing the dimensions of the specified
crop.
If these are acceptable then click crop
Selection button - snaps crop lines to the edges of an active selection
area -
still maintains rectangular shape.
There are two extra crop functions available in the menu.
With an image open, right-click and select Image|Transforms.
Autocrop - automatically removes any solid coloured borders form an
image.
Zealous crop - cuts off areas of highly contrasting colour surrounding
an image
area, such as a border.
open this by right-clicking on the image and selecting it from the View menu. This enables you to scroll around a large picture, and adjust the zoom level using a slider.
This tool can be used on a selection to rotate, scale, shear or move it in pseudo-3D perspective. Select the tool (or press [Shift] + [T]) to bring up its options.
Although there aren't supposed to be any options for this tool, the type of stroke can in fact be altered by right-clicking to get Dialogs- Brushes ( or Shift-Ctrl-B).Shift-click will draw a straight line from your last drawing point to your current position. This also applies to the Paintbrush and Airbrush tools. the erase tool can also be used to eliminate flood or gradient fills. (whereas Undo while highly useful - especially for sampling special effects and experimentation - undoes things in reverse order that they were done)
This copies an area of the image to another area of your choice. (This can be especially useful for retouching photographs). It can be used to pick areas of an image and duplicate them. There are two options available; Image source or Pattern source. Image source works by holding down Shift and Ctrl, this brings up a small cross-hair on screen. Now drag an outline around the part of the image you want to duplicate. Click where you want the clone to go and you will see part of it appear. The more you drag, the more it will appear.
Selecting Pattern source allows you to paint as with the other brush tools but with a patterned background.
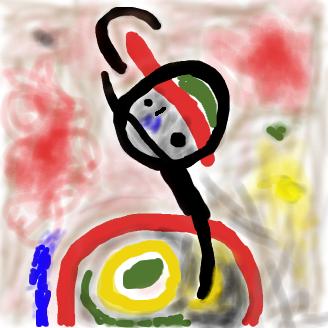
The Gradient Tool blends the background and foreground colours into a gradient, which can be applied in a variety of styles. Altering the colour balance in order to change the overall colours appears only to affect the level in progress at the time!
When building up colours on different levels, I discovered that colour integrity was maintained. In other words, when adding blue on a yellow background, it remained blue rather than becoming green. Even increasing the level of transparency merely decreased the intensity of the blue. This means that it is different to normal painting.
These provide a quick way of altering the appearance of a picture, and there is a fair selection of interesting effects available. I have demonstrated some of them on the Miro picture.
These can be used for drawing specific curves and as another way of
selecting
areas. They can be edited,
deleted and added using Paths from Layers Channels and Paths.
It is even possible to save and import and export the curve. If you
are
familiar with vector drawing
programs such as Adobe Illustrator, these concepts will be familiar.
If not,
and you encounter any
difficulty using this function, the help section within GIMP can be of
assitance.
You close your path by joining the first and last point (this is done
by adding
the final point really close
to the first point). A square sign then appears inside the path. This
command
will turn the path into a
selection.
Clicking outside the previously closed curve will start a new bezier
curve (and
will deactivate the path to
selection command allowing you to add other points inside the closed
curve if
you so wish).
Select Float converts a normal selection region into a Floating Selction. (This can be especially useful for creating animations). If a floating selection is moved with the Move Tool, it will automatically be converted to a floating selction.
Used to move everything from layers and selections to entire images.
As a beginner I found this difficult to do realistically. Special effects and bizarre outcomes are easier to achieve. At present the help section for manipulating photographs has not yet been written. There are however, two tutorials available at http://gug.sunsite.dk/tutorials.tutorials
Scripts allow complex procedures to be saved and then reused at the click of a button.
PATHS can be drawn to contain effects within a group of layers.